
Frequency separation in Singapore is a skin retouching technique that lets you even out tone and blotchiness while keeping the natural texture of pores and fine hairs, so a portrait still looks like a real person rather than a plastic doll. In our humid climate, portraits often show shine, flushed patches, and uneven colour, and the temptation is to blur all of it away. Frequency separation offers a better path, because it splits your image into two layers, one holding colour and tone and the other holding fine detail, so you can fix one without destroying the other. In this guide we will explain the idea simply, walk through a careful workflow, and stress why a light, respectful touch matters most.
Before we start, a word on approach. Good retouching serves the person in the photo. The aim is to present them at their best on a good day, not to erase who they are. Keep freckles, keep smile lines, keep the character that makes a face a face, and always retouch with the subject’s comfort in mind.
What Frequency Separation Actually Does
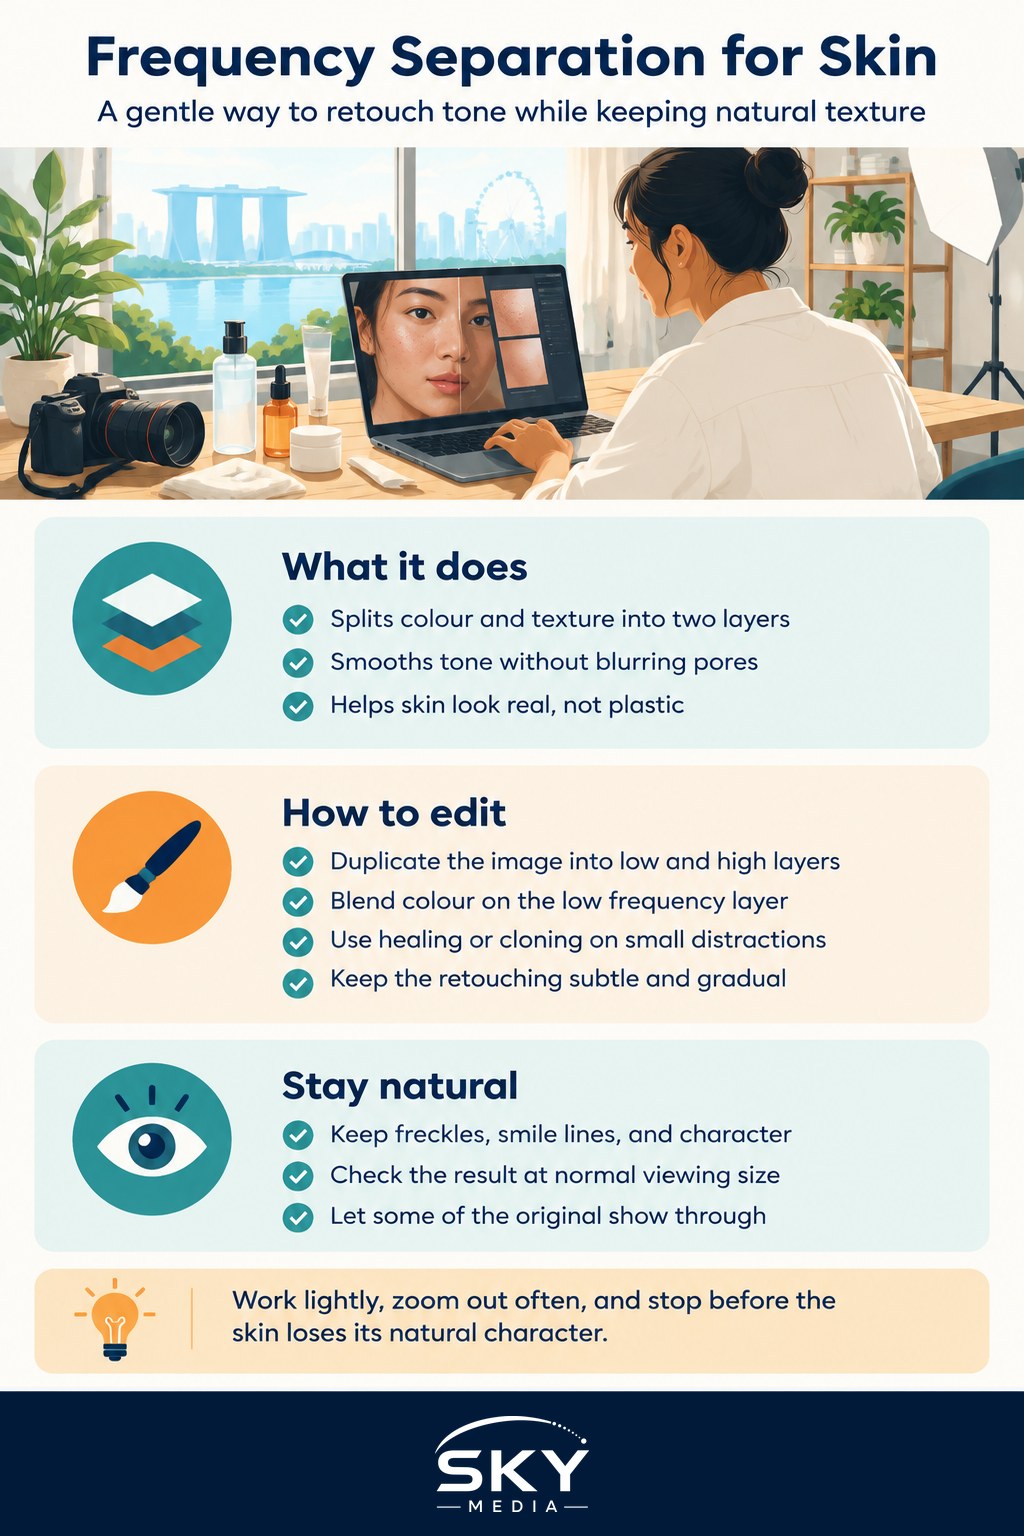
Every photo of skin contains two kinds of information layered on top of each other. There is low frequency information, which is the broad colour and brightness: the shadows, the general skin tone, and any blotchy or uneven patches. Then there is high frequency information, which is the fine detail: pores, tiny hairs, and the texture that tells your eye you are looking at real skin.
The problem with old-fashioned retouching, where you simply blur or smudge skin, is that it destroys the high frequency texture along with the blemishes, leaving that waxy, artificial look. Frequency separation solves this by placing the two kinds of information on separate layers. You can smooth uneven colour and tone on the low frequency layer while leaving the texture layer untouched, so pores and detail survive. That is the whole magic: fix the colour and blotch, keep the texture.
This technique sits alongside other portrait tools rather than replacing them. Many photographers reach for it only after simpler fixes, and it works best when it is one part of a considered edit. If you are newer to portrait work, how to retouch portraits in Singapore is a gentler starting point, and understanding how to use layers and masks will make everything here far clearer.
A Careful, Respectful Workflow
The exact steps vary between editing programs, but the logic is the same everywhere. You duplicate your image twice, turning one copy into a low frequency layer and one into a high frequency layer. The low layer is softened so it holds only colour and broad tone. The high layer is set up to hold only the fine texture and is combined with the low layer so that, stacked together, they look identical to your original photo.
With the two layers ready, you do most of your work on the low frequency layer. Using a soft brush or a selection, you gently blend uneven colour, calming a red patch here or a shadowy blotch there, so skin tone flows more evenly. Because you are only touching colour and tone, the pores and texture on the high layer stay put, and the skin still reads as real. Work at a modest strength and build up slowly rather than smoothing everything in one heavy pass.
The high frequency layer is for removing specific, temporary things: a stray hair across the face, a small blemish, a bit of lint. Here you use healing or cloning tools to replace an unwanted spot of texture with clean texture from nearby. This is precise, targeted work, not a blanket smooth. Resist the urge to sweep away every pore, because that is exactly what makes retouching look fake.
Throughout, zoom out often. It is easy to obsess at high magnification and overdo things that no one would ever notice at normal viewing size. Check your work at the size the photo will actually be seen, whether that is a phone screen or a print. A subtle dodge and burn pass afterwards can even out remaining tone beautifully, and how to dodge and burn covers that soft, natural approach in more detail.
Keep It Natural and Kind
The most important skill in frequency separation is knowing when to stop. Real skin has texture, tone shifts, and small imperfections, and keeping them is what separates a professional, believable portrait from an uncanny one. A helpful test is to lower the opacity of your retouching so a little of the original always shows through, pulling the result back toward reality.
Be thoughtful about who you are editing and why. Smoothing a temporary breakout on a nervous subject before an important portrait is kind. Reshaping someone’s face or erasing every natural feature can send an unkind message about how they should look. When you photograph and retouch people, treat their image with the same respect you would want for your own, and check they are happy with the direction.
Frequency separation in Singapore gives you a powerful, controlled way to present skin at its best without stripping away its humanity. Learn the two-layer idea, work gently on colour first and texture only where needed, and always step back to keep things natural. Practise on your own portraits before working on others, and you will build a light, respectful touch that flatters your subjects and keeps them looking like themselves.
Frequently Asked Questions
Do I need Photoshop to use frequency separation? Not necessarily. The technique is usually taught in Photoshop, but other editors with layers and blend modes can follow the same two-layer logic. Check whether your software supports layers and fine control over blur before you start.
Is frequency separation suitable for beginners? It is a fairly advanced technique, so beginners tend to overdo it. Get comfortable with layers, masks and simple healing first. Practise on your own portraits at low strength before attempting anyone else’s, and compare with the original often.
Why does skin look plastic even after I used frequency separation? Usually the low frequency layer was smoothed too hard, or pores were wiped from the texture layer. Reduce the effect, lower the layer opacity so some of the original shows, and leave natural texture in place on the high frequency layer.
Does the technique work on photos taken in strong sunlight? It helps with uneven colour and blotchiness, but it cannot rescue harsh shadows or blown highlights. Those are better handled by dodging and burning or, better still, by shooting in open shade or with a reflector to soften the light.
Should I tell a client how much I have retouched their portrait? It is good practice to agree the level of retouching beforehand and share a preview. Light clean-up of temporary blemishes is usually welcome, but reshaping features can upset people, so ask what they are comfortable with.