

When the haze rolls in, most households check the National Environment Agency (NEA) readings on their phones and then guess what is happening inside the flat. A PM2.5 monitor in Singapore homes closes that gap. It tells you whether closing the windows, running the purifier or switching on the aircon is actually lowering the fine particles you breathe, room by room.
This guide is about measuring, not filtering. It covers the sensor types you will see on the box, how accurate a home device can realistically be in our humid climate, which extra readings are worth paying for, and how to link a monitor to the rest of your smart home so it does something useful rather than just glowing red on a shelf.
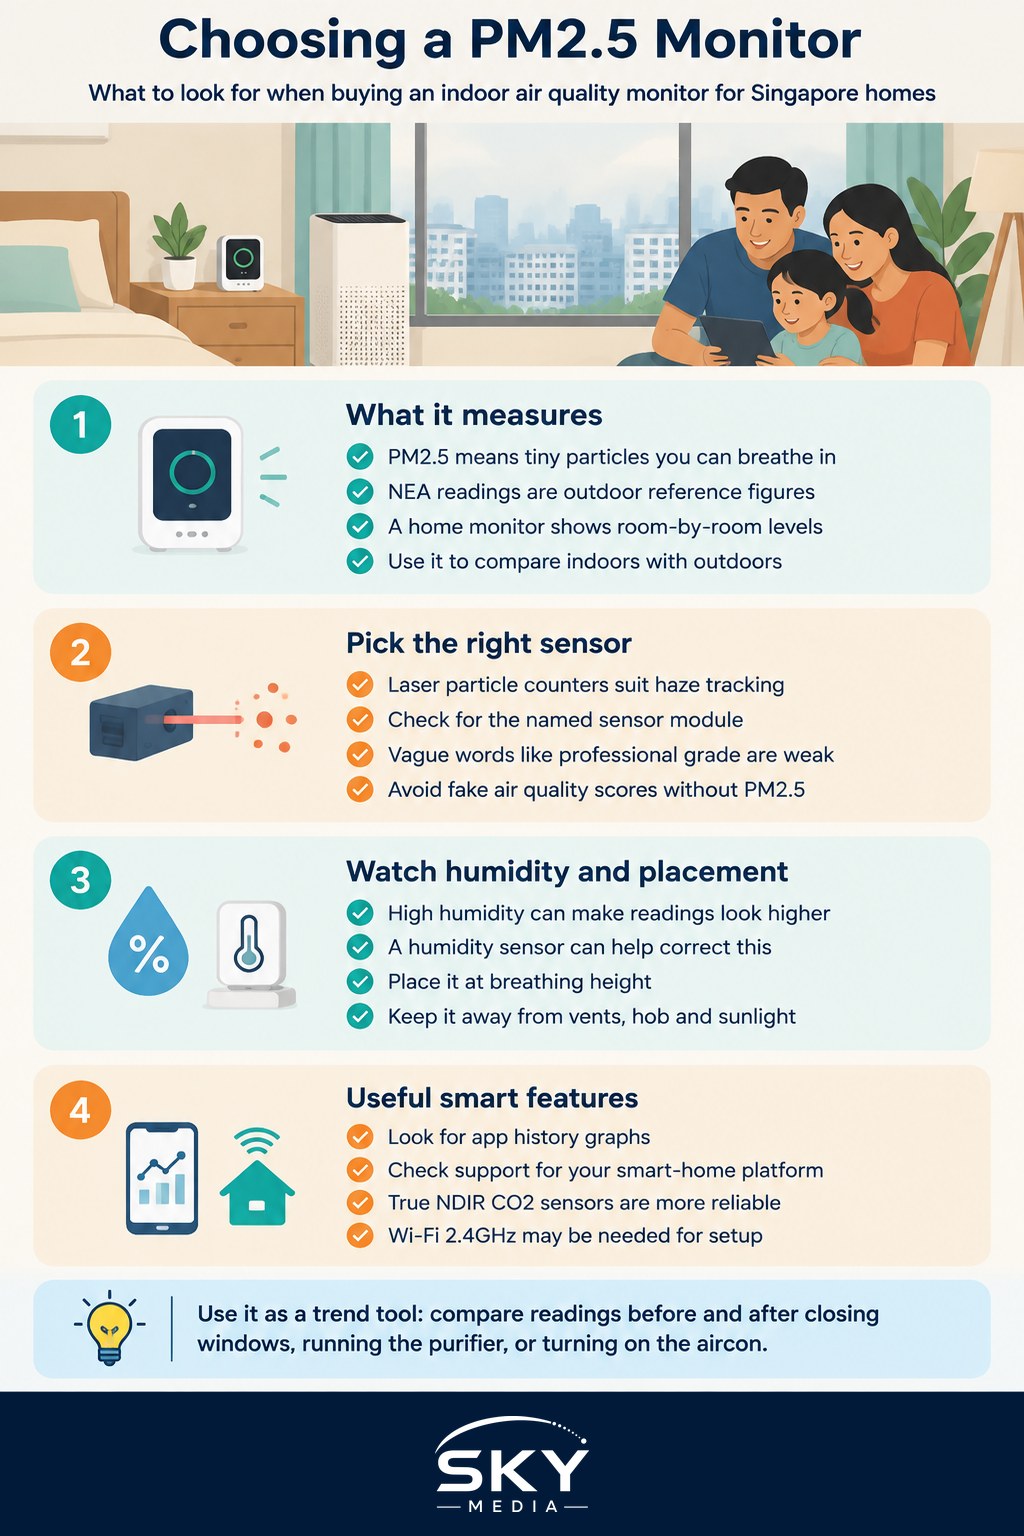
What a PM2.5 Monitor Actually Measures
PM2.5 refers to particles 2.5 micrometres across or smaller, small enough to travel deep into the lungs. Haze smoke from land and forest fires in the region is a major source during the dry months, but cooking, incense, candles, renovation dust and traffic near your block also add to the count.
NEA publishes outdoor readings, including the Pollutant Standards Index (PSI) and hourly PM2.5 concentrations by region. These are taken by calibrated reference stations and are the official figures for health advisories. A home monitor does a different job: it estimates the concentration in the room where it sits, in micrograms per cubic metre (µg/m³), so you can compare indoors against outdoors and see the effect of what you do.
Treat your monitor as a trend tool. If the reading drops sharply after you shut the windows and start a purifier, that tells you something real, even if the absolute number is a little off.
Sensor Types and How Accurate They Can Be
Almost every consumer monitor uses an optical sensor. A light source shines through a small chamber, a fan or heater pulls air through, and a detector counts the light scattered by passing particles. The software then converts this into a mass estimate. The main differences are in the light source and how carefully the manufacturer has calibrated it.
| Sensor type | How it works | Typical strengths | Watch out for |
|---|---|---|---|
| Laser particle counter | Laser beam and fan count individual particles by size | Better sensitivity at low levels, reports PM1, PM2.5 and PM10 separately | Costs more; laser and fan wear out over years of continuous use |
| Infrared LED sensor | LED light and a heater create airflow; detector reads overall scattering | Cheap, quiet, low power | Less precise at low concentrations, slower to react, often only one PM figure |
| Estimated “air quality” score | Combines a gas or VOC sensor with an algorithm; no particle counter | Very cheap, sometimes built into other gadgets | Does not measure PM2.5 at all; useless for haze tracking |
| Reference-grade monitor | Weighing (gravimetric) or beta-attenuation methods used by agencies | The benchmark for official data | Not designed or priced for home use |
For haze, a laser particle counter is the sensible choice. Check the specification sheet for the named sensor module and whether the brand publishes how it was calibrated or tested against a reference instrument. Vague claims such as “professional grade” without any detail are not a good sign.
The humidity problem in Singapore
Optical sensors can overestimate particles when humidity is very high, because particles absorb water and appear larger. Singapore homes without aircon often sit at high relative humidity, so a cheap monitor near an open window can read higher than reality on a damp morning. Better devices include a humidity sensor and apply a correction. If a reading spikes during a rainstorm when the outdoor air is clean, humidity is the likely cause.
Placement matters as much as the sensor
- Keep it at breathing height, around a table or bedside level, not on the floor.
- Place it at least an arm’s length from the purifier outlet, aircon vents and the kitchen hob, or you will measure a local stream rather than the room.
- Avoid direct sunlight and spots where it can get splashed.
- Give it a few minutes after switching on before trusting the number.
Extra Readings Worth Paying For
Many monitors bundle several sensors. Not all of them earn their keep.
- CO2 (carbon dioxide). Useful because the usual haze advice is to close up the room. A true CO2 sensor (look for “NDIR”, a non-dispersive infrared sensor) shows when a sealed bedroom is getting stuffy and needs a short airing or some fresh air when outdoor conditions allow. Devices that show “eCO2” are estimating from a VOC sensor and are much less reliable.
- Temperature and humidity. Cheap to include and helpful for the humidity correction above, plus for spotting damp corners that encourage mould.
- VOCs (volatile organic compounds). These sensors react to fumes from paint, cleaning sprays and new furniture. They give a relative index rather than a precise reading, which is fine for noticing when a room needs ventilating. Our guide to reducing indoor air pollutants and VOCs explains the common sources.
- PM1 and PM10. Laser monitors often report these alongside PM2.5. PM10 helps you tell coarse dust from renovation work apart from fine smoke.
Smart-Home Integration: Making the Monitor Act
A standalone screen is fine for a single room. Connected monitors become far more useful when they can trigger other devices.
- App and history. At minimum, choose a monitor whose app keeps a history graph. Comparing a full day of readings tells you far more than one glance.
- Ecosystem support. Check whether the device works with the platform you already use, such as Google Home, Amazon Alexa, Apple Home or the open Matter standard. Some support Home Assistant locally, which keeps working if the maker’s cloud goes down.
- Automations. The best use is a rule such as “if bedroom PM2.5 rises above my chosen level, turn the purifier to high” or “if CO2 climbs, send a reminder”. Pick your own thresholds; NEA’s health advisories are the reference for interpreting outdoor levels.
- Wi-Fi band. Many smart devices only connect on 2.4GHz. If your router merges bands under one name, setup can fail, so check before buying.
- Privacy and updates. Read what data the app collects and whether the brand still issues firmware updates. A device abandoned by its maker can stop working with its app.
A Simple Buying Checklist
- Laser PM2.5 sensor with the module or test data named.
- Separate PM2.5 reading, not just a colour or a composite score.
- Built-in humidity sensor, ideally with correction.
- A true NDIR CO2 sensor if you will be sealing up bedrooms.
- App history and support for your smart-home platform.
- Reasonable warranty and a local seller you can return it to.
Prices and models change often, so compare current listings and independent reviews rather than relying on packaging claims.
Using Your Readings During Haze Season
Once the monitor is running, use it to test your own routine. Read it with windows open, then closed, then with a purifier on, and note how long each change takes to bring the number down. That tells you whether your purifier is sized for the room and whether gaps around windows are letting smoke in.
Measure the bedroom you sleep in first, since that is where you spend the longest unbroken stretch. If you only have one monitor, move it between rooms on different days rather than leaving it in the living room.
For the fuller picture of what to do once you see high readings, see how to improve indoor air quality at home in Singapore. Houseplants are pleasant but will not visibly move a PM2.5 reading, which is worth knowing before you rely on them; our piece on indoor plants for cleaner air sets realistic expectations.
A monitor will not make the air cleaner on its own. What it gives you is feedback, so the purifier, the aircon and the windows are used when they matter, and you can stop guessing during the weeks when the haze comes and goes.