
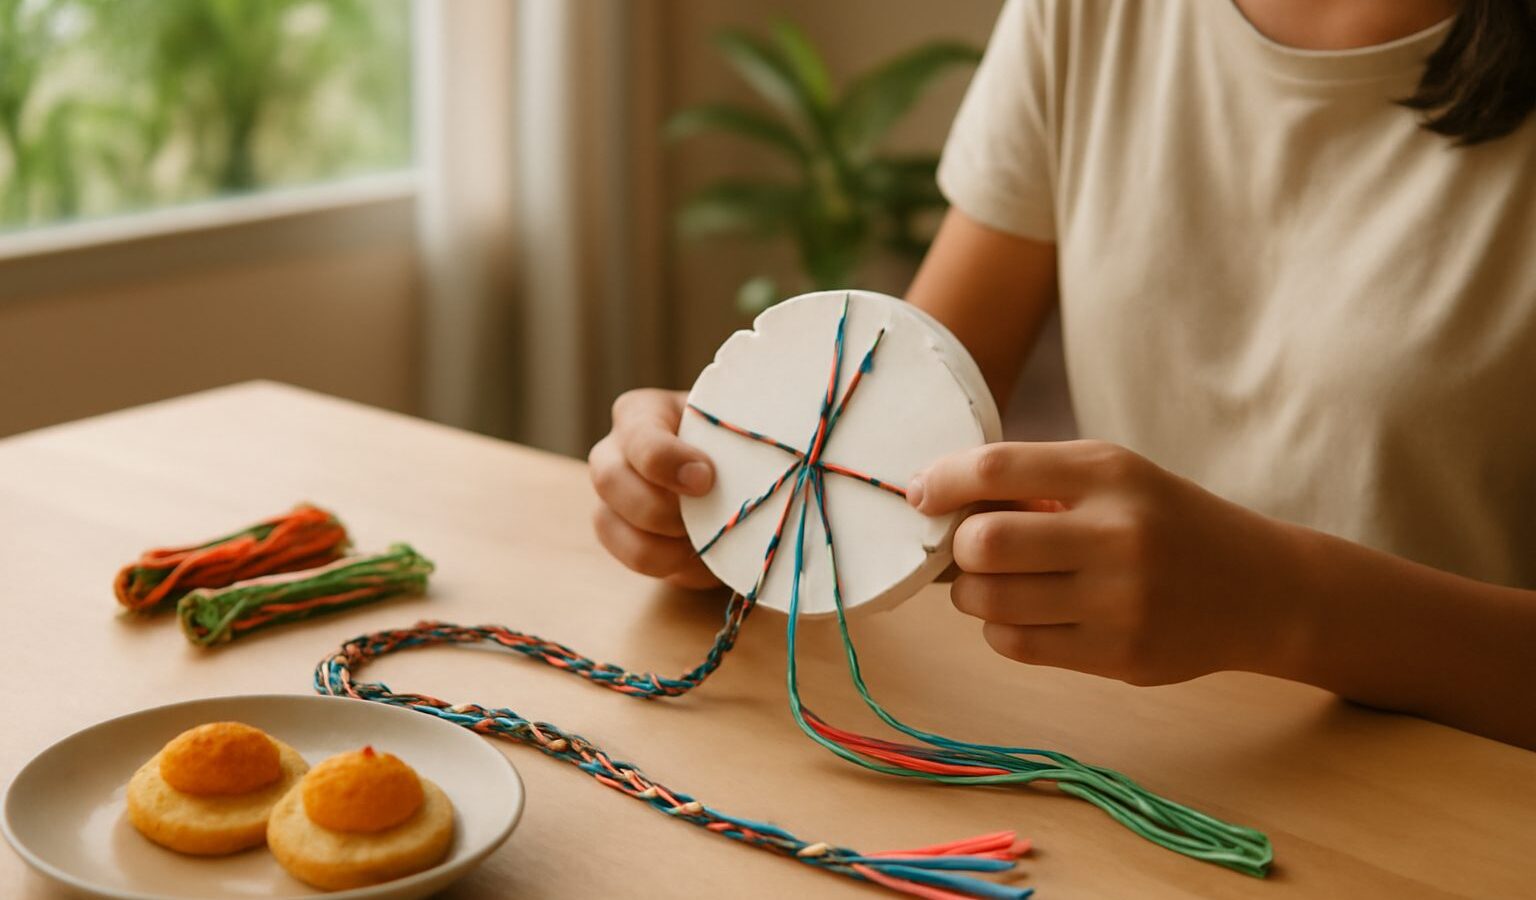
Kumihimo braiding is a Japanese craft of interlacing threads into strong, decorative cords. The name roughly means “gathered threads”. Traditionally, these cords tied samurai armour, kimono sashes and ceremonial objects. Today hobbyists use the same techniques to make bracelets, lanyards, keychains, bag straps and cords for necklaces.
It is a good hobby for small Singapore homes. A beginner setup fits in a pencil case, you can braid on the MRT or in front of the television, and the results look impressive surprisingly quickly. This guide explains how kumihimo differs from other fibre crafts, what to buy, and how to finish your first braid.

How Kumihimo Differs From Other Cord Crafts
If you have tried macrame or friendship bracelets, you may wonder what makes kumihimo distinct. The key difference is structure.
- Macrame ties threads into knots, usually with fixed anchor cords.
- Friendship bracelets use knotting too, tying rows of half hitches.
- Weaving passes a weft thread over and under fixed warp threads on a loom.
- Kumihimo has no knots. Threads move in a repeating pattern around a central point, crossing over one another to form a round or flat braid that is firm and even.
Because the threads are braided rather than knotted, kumihimo cords are smooth, flexible and strong. Changing the colour arrangement at the start produces spirals, chevrons, stripes and dots without learning new moves.
Choosing Your Equipment
There are two main tools for kumihimo. Beginners almost always start with the foam disk.
| Tool | What it is | Pros | Cons | Best for |
|---|---|---|---|---|
| Foam kumihimo disk | Round foam disk with numbered slots around the edge and a hole in the centre | Light, portable, cheap, threads stay locked in slots | Slots wear out with heavy use | Beginners and braiding on the go |
| Foam square plate | Square foam plate with slots | Makes flat braids | Fewer pattern options than a disk | Flat straps and bookmarks |
| Marudai | Traditional wooden stand with a round mirror top and weighted bobbins | Smooth, even tension, endless patterns, traditional feel | Bulky, costly and slower to learn | Committed hobbyists |
| Takadai and other looms | Large frames for complex flat braids | Intricate designs | Expensive, needs a lot of space | Advanced braiders |
You can find foam disks and starter kits at craft supply shops, in some stationery and art stores, and from online marketplaces. Starter kits often include a disk, a few colours of thread and bobbins, which removes the guesswork.
Other things you will need:
- Thread or cord. Satin rattail cord (a smooth, round satin cord about 1 to 2 mm thick) is the easiest for beginners because it is slippery and shows the pattern clearly. Embroidery floss, crochet cotton and yarn also work.
- Bobbins. Small plastic reels that hold long lengths of thread and stop tangling.
- Scissors and a tape measure.
- A small weight. A clip or a few coins in a bag, hung from the braid underneath the disk, keeps tension steady.
- Glue and end caps if you plan to make jewellery, so the ends look neat and do not fray.
Setting Up Your First Braid
The classic first project is an eight warp round braid, often called kongo gumi. It makes a sturdy spiral cord ideal for a bracelet.
- Cut your threads. Cut four lengths of cord, each roughly four times the length of the finished braid you want plus extra for finishing. Braiding uses up length quickly.
- Fold and tie. Line up the four lengths, fold them in half and tie them at the fold with a short piece of thread. You now have eight strands.
- Thread the disk. Push the knot through the centre hole from the top so it hangs below. Place two strands in the slots either side of each of the four main dots, usually marked at the top, bottom, left and right of the disk.
- Wind bobbins. Wind each strand onto a bobbin, leaving some slack.
- Attach a weight. Clip your weight to the knot under the disk.
The Basic Braiding Movement
Hold the disk with the dot labelled 32 (or the top position) facing you.
- Take the top right strand and move it down to the slot just to the right of the bottom pair.
- Take the bottom left strand and move it up to the slot just to the left of the top pair.
- Rotate the disk a quarter turn clockwise.
- Repeat: top right down, bottom left up, turn.
That is the whole movement. After a few rounds you will see a braid emerge through the centre hole. Keep going until your braid reaches the length you want.
Tips for an even braid:
- Keep a steady rhythm. Always move the same way and rotate in the same direction.
- Check the “point”. The place where the threads meet in the centre should stay centred. If it drifts, your tension is uneven.
- Pause correctly. If you stop mid braid, finish a full move so you know where to resume. Most disks lock threads in place so nothing unravels.
Finishing and First Projects
To finish, remove the strands from the disk, tie the ends together firmly or glue them into an end cap, and trim. For a bracelet, add a clasp or a sliding knot so it adjusts to your wrist.
Easy first projects include:
- Bracelets in two or three colours. Try different starting positions to see how the pattern changes.
- Keychain cords using thicker cord for durability.
- Phone or lanyard straps.
- Bookmarks using a flat braid on a square plate.
- Necklace cords for a pendant you already own.
Once you are comfortable, try braiding with 12 or 16 strands, adding beads along the braid, or following charted patterns. Many braiders share free charts online.
Learning and Practising in Singapore
Kumihimo is easy to learn from video tutorials and printed instructions that come with kits. If you prefer in person guidance, look out for craft workshops run by community centres, libraries, craft shops and Japanese cultural events, which sometimes include braiding sessions. When choosing a workshop, check what is included in the materials, the class size, and whether it suits complete beginners.
Our humid weather does not affect kumihimo much, but store threads in sealed bags or boxes so they stay clean and free from dust. Keep finished pieces away from damp corners, especially cotton cords, to avoid mildew.
Kumihimo braiding rewards patience with beautiful, durable results. Start with a foam disk, a few colours of satin cord and one simple braid, and within an evening you will have made something you can wear.
Explore more: Getting Started With Embroidery and Cross-Stitch and Pottery and Craft Workshops.
Frequently Asked Questions
Is kumihimo hard for a complete beginner? No, the basic movement is simple: move the top right strand down, the bottom left strand up, then turn the disk a quarter turn. Keep a steady rhythm and you will see a braid emerge within minutes. Starter kits remove the guesswork about materials.
Why is my kumihimo braid coming out uneven? Uneven tension is the usual cause. Always move strands the same way, rotate the disk in the same direction and check that the point where threads meet stays centred. A small weight hanging below the disk helps keep the tension steady.
How much cord should I cut for a bracelet? Braiding uses up length quickly, so cut generously: each cord should be roughly four times the length of the finished braid you want, plus extra for finishing. It is easier to trim a longer braid than to start over.
Can children try kumihimo? Older children who can follow the repeating movement often enjoy it, especially with a foam disk and colourful cord. Supervise anyone young, since small bobbins, end caps and glue are not suitable for toddlers. Choose simple projects such as short bracelets.
Which colours show the pattern best on a first braid? Use two or three strongly contrasting colours, because the pattern comes from how the colours are arranged at the start. Smooth satin rattail cord shows the pattern clearly, so it suits beginners. Changing the starting positions gives spirals, stripes or dots.