

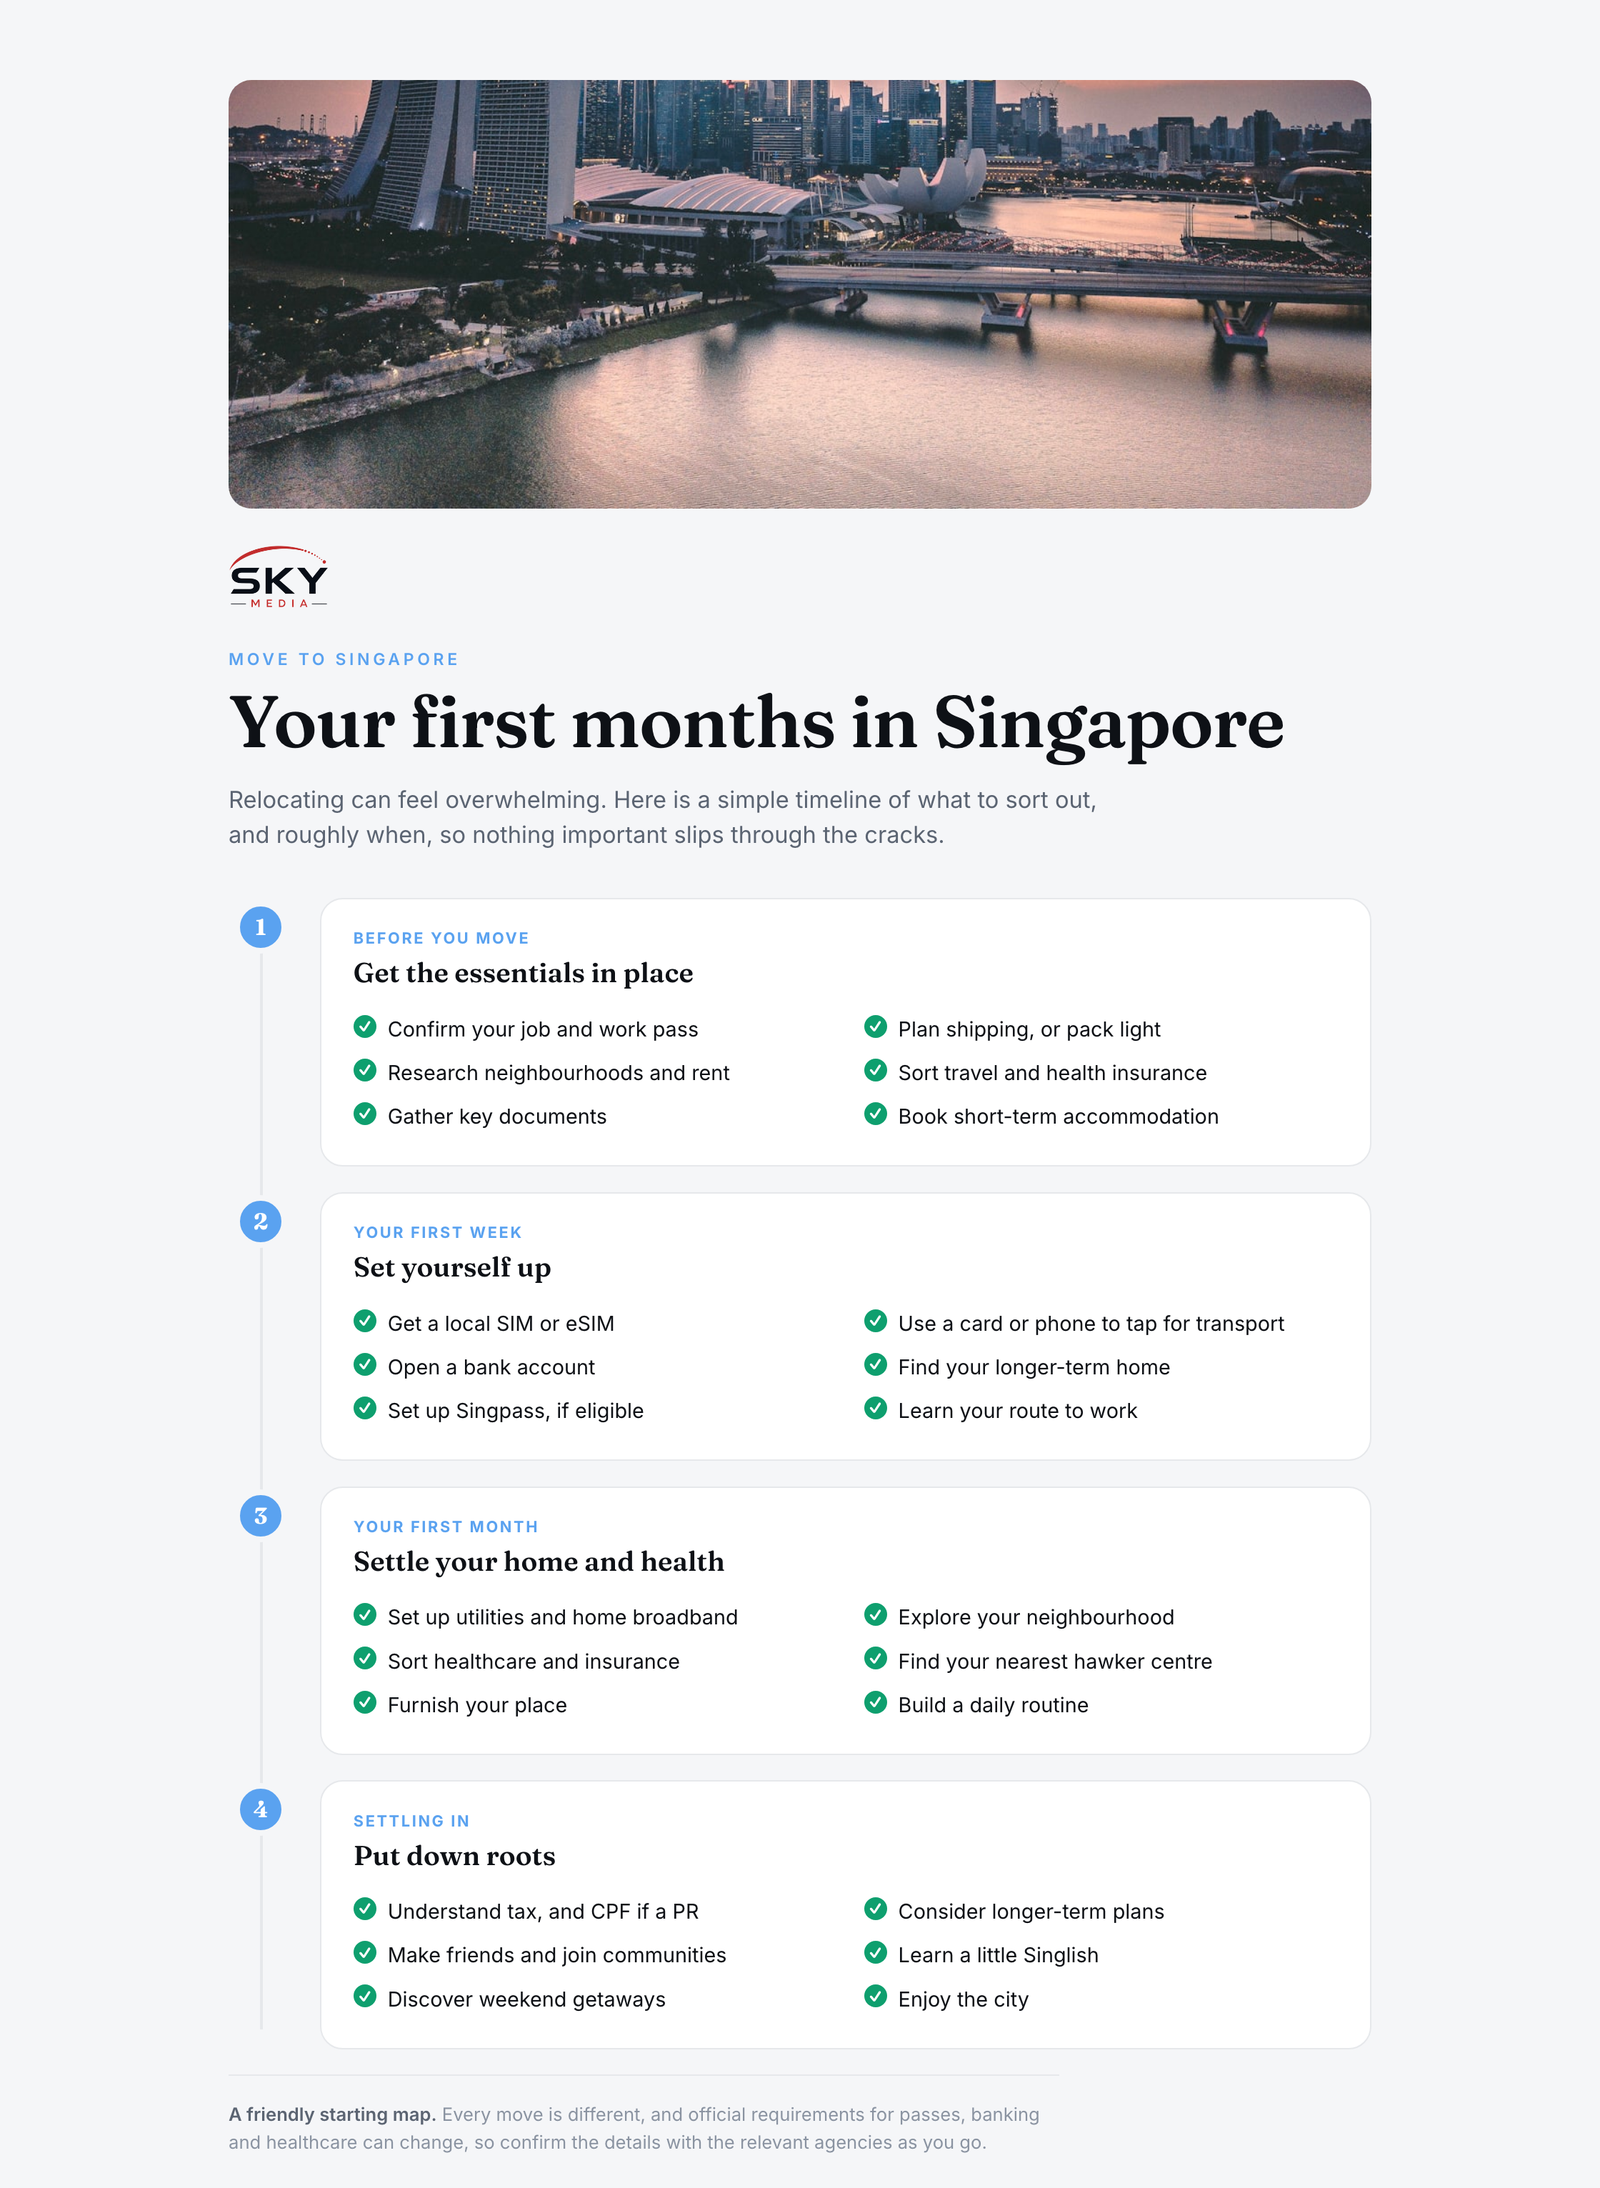
Moving to Singapore is exciting, and it can feel like a hundred small tasks all landing at once. The good news: almost everything sorts itself out in a predictable order. This checklist breaks your move into three simple phases, before you arrive, your first week, and your first month, so you always know what to tackle next. Whether you are relocating to Singapore for work, study, or family, work through it top to bottom and you will settle in far more smoothly.
Keep this page bookmarked. It is a hub, and each section links out to a deeper guide when you are ready for the detail.
Quick orientation: Singapore runs on a handful of official agencies. Immigration and passes go through the ICA (Immigration and Checkpoints Authority) and, for work, the MOM (Ministry of Manpower). Transport is the LTA (Land Transport Authority). When something official is involved, always confirm the current rules on the relevant agency’s website, because processes do change.
Before you arrive
The work you do before landing saves you the most stress later. Aim to close out this list while you still have time and calm.
- [ ] Confirm your pass or visa. Your employer usually applies for an Employment Pass, S Pass, or other work pass through MOM; students receive a Student’s Pass linked to their institution. Make sure you have your In-Principle Approval (IPA) letter, as you may need it at the airport and for early admin.
- [ ] Shortlist housing (do not commit blind). Draw up a shortlist of neighbourhoods and a couple of viewings, but avoid signing a long lease before you have seen places in person. If you are unsure where to base yourself, our guide on where to live in Singapore walks through the trade-offs between districts.
- [ ] Gather your documents. Passport, IPA or pass approval, employment or admission letter, marriage and birth certificates (if family are joining you), academic certificates, driving licence, and vaccination records. Keep digital scans in the cloud and a physical folder in your hand luggage.
- [ ] Sort a first week of accommodation. Book a serviced apartment, hotel, or short-term rental for your first one to two weeks so you are not house-hunting with your luggage.
- [ ] Tell your bank and set up a travel card. You will need to spend before your local account opens, so make sure a card works here and your bank knows you are abroad.
Your first week
This week is about getting connected and mobile. Nothing here is complicated, but doing it early makes everything else easier.
1. Get a local SIM
Pick up a prepaid SIM at the airport or any telco shop. You will need it for two-factor logins, ride apps, and appointment bookings almost immediately. You can switch to a contract plan later once you have an address and a local bank account.
2. Open a bank account
A local account unlocks salary payments, bill payments, and the app-based transfers Singaporeans use daily. Bring your passport, pass or IPA, and proof of address if you have it. Our step-by-step guide to opening a bank account in Singapore covers what each bank asks for and how to choose.
3. Set up transport
Get a contactless travel card, or simply tap in with a bank card or phone, and you can ride buses and the MRT straightaway. The network is clean, cheap, and covers most of the island. Start with our Singapore public transport guide to understand fares, apps, and routes.
4. Lock down temporary housing logistics
Confirm check-in and check-out for your short-term place, note the nearest MRT station, and scout the neighbourhood you are considering for a permanent home. Living somewhere for a week teaches you more than any listing photo.
First-week quick tips
- Save the numbers for your pass processing, your landlord or agent, and emergency services (999 for police, 995 for ambulance and fire).
- Carry your passport and IPA until your pass card is issued.
- Download the common ride-hailing and food-delivery apps; they will need your new SIM and card.
Your first month
Now you settle in properly: a permanent home, utilities, healthcare, and your official documents.
Secure permanent housing
Once you know an area, sign your lease. Read the tenancy agreement carefully, note the security deposit (commonly one to two months’ rent as a rough guide), and confirm what the diplomatic clause and minor-repair terms say. When you get the keys, our guide to setting up your HDB home helps you go from empty flat to livable in a weekend.
Turn on utilities and connectivity
Arrange your electricity, water, and gas account, plus home internet. In many rentals the landlord starts the utilities account and you reimburse, so ask early. Book your home broadband installation as soon as you have a move-in date, since slots can fill up.
Sort out healthcare
Singapore’s healthcare is excellent but largely user-pays, so cover is essential.
- [ ] Confirm the health insurance your employer provides, and top it up privately if the coverage is thin.
- [ ] Register with a nearby GP clinic or polyclinic for everyday care.
- [ ] Note the closest hospital with an emergency department.
Collect your pass card or IC
Once your work or student pass is approved, ICA will arrange for you to complete registration and collect your pass card, and this often includes a short appointment for biometrics and a photo. Follow the instructions in your approval letter and book any required slots promptly. Confirm the exact steps and required documents on the official ICA website, and for work-pass conditions check MOM.
Note on converting your driving licence
If you plan to drive, you generally need to convert a foreign licence to a Singapore one within a set period after you become eligible, which may involve a basic theory test. Rules depend on your licence’s country of issue, so check the current requirements with the LTA before you assume your existing licence will keep working here.
Find your community
The practical box-ticking matters, but so does feeling at home. Join an interest or sports group, a neighbourhood or faith community, or an expat or newcomer network in your area. A few friendly faces in your first month singapore experience make the difference between coping and genuinely enjoying the move.
Your first-month checklist at a glance
- Confirm pass or visa and keep documents handy (before arrival)
- Shortlist housing and book short-term accommodation (before arrival)
- Buy a local SIM (week one)
- Open a bank account (week one)
- Get a travel card and learn the transport network (week one)
- Sign a permanent lease and set up your home (month one)
- Activate utilities and home internet (month one)
- Arrange health insurance and register with a clinic (month one)
- Complete pass registration and collect your card via ICA (month one)
- Check driving-licence conversion rules with LTA if you will drive (month one)
- Connect with a local community (month one)
Tick these off and, a month in, you will have gone from new to Singapore to genuinely settled. Take the admin one phase at a time, lean on the official sources for anything formal, and give yourself credit; relocating to Singapore is a big move, and you are handling it.
Explore more: Open a bank account in Singapore · Setting up your HDB home · Singapore public transport guide · Where to live in Singapore