

You have bought the Mac. Now comes the part nobody warns you about: the first week, when your fingers keep reaching for the wrong keys and you cannot find where your files went. Switching from Windows to Mac is easier than ever, but a little planning saves hours of frustration. This guide skips the buying debate (see Mac vs Windows: which should you choose if you are still deciding) and focuses on the switch itself: moving your files, learning the shortcuts, replacing your apps and setting up macOS so it feels like home.
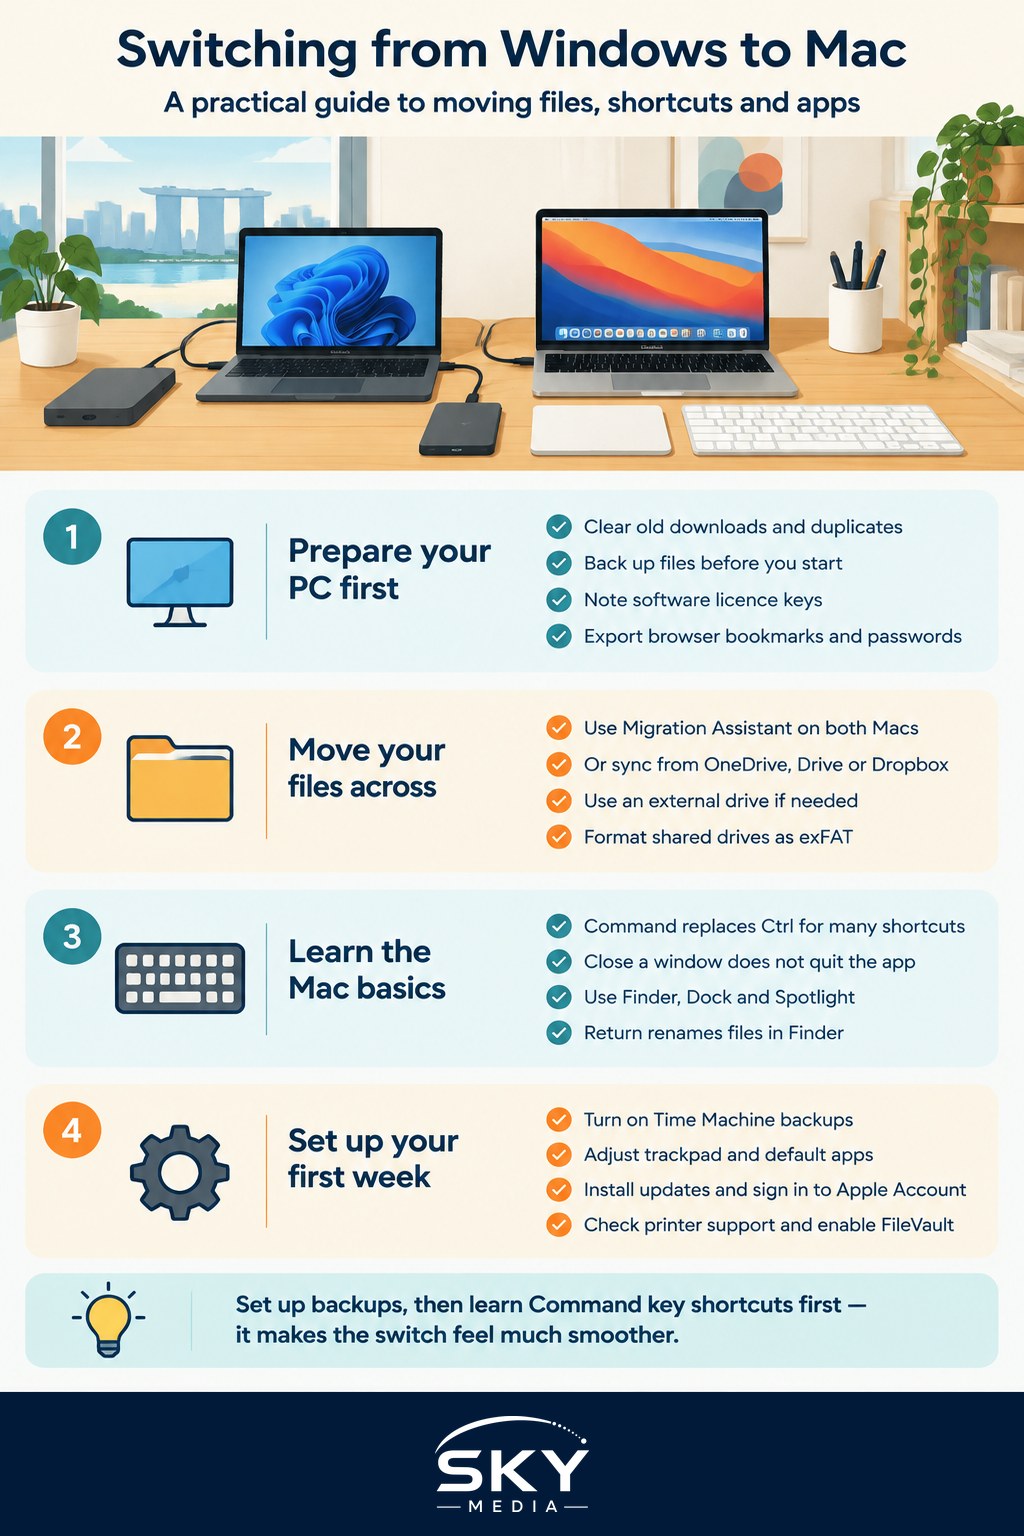
Before You Start: Prepare Your Windows PC
A smooth migration starts on the old machine.
- Tidy up first. Delete old downloads, duplicate photos and programs you never use. Less data means a faster transfer.
- Back up everything. Copy important files to an external drive or cloud storage before you begin, in case anything goes wrong.
- Note your licences. Some paid software has licence keys or needs to be deactivated on the old PC before it can be activated elsewhere. Check each program’s account page.
- Export browser data. If you use Chrome, Edge or Firefox, signing into the browser account syncs bookmarks and passwords. Alternatively, export bookmarks to a file.
- Check your password manager. If you rely on a password manager, make sure it has a Mac version and you know your master password.
Moving Your Files to the Mac
There are three main ways to get your data across. Choose based on how much you have and how comfortable you are with each tool.
1. Apple’s Windows Migration Assistant. Apple provides a free Windows Migration Assistant that you install on your PC. With both computers on the same network, the Mac’s built-in Migration Assistant can pull across documents, photos, music, browser bookmarks, contacts and calendars from supported apps, and some settings. It does not move Windows programs themselves, since those will not run on macOS. Check Apple’s support site for the version that matches your Windows and macOS versions.
2. Cloud storage. If your files already live in OneDrive, Google Drive or Dropbox, simply install the Mac app and sign in. Your files sync down automatically. This is often the easiest route for people who already work in the cloud.
3. External drive. Copy files onto a USB drive on Windows, then plug it into the Mac. One catch: drives formatted as NTFS, the usual Windows format, can be read by macOS but not written to without extra software. If you want a drive that works fully on both systems, format it as exFAT. Formatting erases the drive, so do it before copying files.
Once files are on the Mac, organise them into the Documents, Pictures, Music and Desktop folders in your home folder, which you can reach through Finder.
Keyboard Shortcuts: The Biggest Adjustment
The most important thing to remember is that on a Mac, the Command (⌘) key does most of what Ctrl does on Windows. Once that clicks, much of your muscle memory transfers.
| Task | On Windows | On Mac |
|---|---|---|
| Copy, cut, paste | Ctrl + C, X, V | Command + C, X, V |
| Undo | Ctrl + Z | Command + Z |
| Close the app completely | Alt + F4 | Command + Q |
| Switch between apps | Alt + Tab | Command + Tab |
| Search for files and apps | Windows key, then type | Command + Space (Spotlight) |
| Screenshot | Windows + Shift + S | Command + Shift + 4 (selection) or Command + Shift + 5 (options) |
| Force quit a frozen app | Ctrl + Shift + Esc | Command + Option + Esc |
| Delete a character to the right | Delete | Fn + Delete |
| Lock the screen | Windows + L | Control + Command + Q |
A few other differences catch new users out:
- Closing a window does not quit the app. Clicking the red button closes the window but often leaves the app running. A small dot under the app icon in the Dock shows it is still open. Use Command + Q to quit.
- Right-click exists. On a trackpad, click with two fingers. You can also hold Control and click.
- Option is the Mac’s Alt key. It is used for special characters and alternative menu options.
- Rename files with Return. Selecting a file in Finder and pressing Return lets you rename it. To open it, use Command + Down Arrow or double-click.
Finding Your Way Around macOS
Many Windows features have Mac equivalents with different names.
- Finder is like File Explorer. The sidebar shows your common folders, iCloud Drive and connected drives.
- The Dock at the bottom of the screen is like the taskbar. Drag apps in or out to customise it.
- The menu bar at the top always shows the menus for whichever app is active, rather than inside each window.
- System Settings replaces the Control Panel and Windows Settings.
- Spotlight (Command + Space) is the fastest way to open apps, find files and do quick calculations.
- Mission Control shows all open windows, usually with a three-finger swipe up on the trackpad.
- Window arrangement. Recent versions of macOS let you snap windows to halves or quarters of the screen by dragging them to the edges, similar to Windows Snap. On older versions, many users install a third-party window manager.
Replacing Your Windows Apps
Most popular software has a Mac version, so check before you look for alternatives.
- Microsoft 365. Word, Excel, PowerPoint, Outlook and Teams all have Mac versions, and your existing subscription usually covers them. A few advanced Excel features differ, so test any complex spreadsheets you rely on.
- Browsers. Chrome, Edge and Firefox are available for Mac, alongside Apple’s own Safari.
- Built-in alternatives. Preview opens PDFs and images and handles simple edits. Pages, Numbers and Keynote are Apple’s free office apps. Photos manages your photo library.
- Windows-only software. Some accounting, engineering or specialist workplace software is Windows only. Options include a web-based version, a Mac alternative, or virtualisation software that runs Windows inside macOS. Check licensing and compatibility with the vendor first, and ask your IT team if it is a work machine.
- Games. The Mac game library is smaller. Our guide to gaming on a Mac explains what you can play and how.
Install apps from the Mac App Store or directly from the developer’s official website. Avoid random download sites.
Essential Setup in Your First Week
Set these up early and the Mac will feel far more comfortable.
- Turn on Time Machine. Plug in an external drive and enable Time Machine in System Settings for automatic backups.
- Adjust trackpad settings. Turn on Tap to Click and try different scrolling directions if the default “natural” scrolling feels backwards.
- Set your default browser and mail app in System Settings.
- Sign in with your Apple Account to sync with an iPhone, use iCloud and download apps. If you also have an iPhone, AirDrop and copy-paste between devices become very handy.
- Install updates through System Settings so you have the latest security fixes.
- Check printer and scanner support. Most modern printers work automatically, but some need a Mac driver from the manufacturer’s website.
- Turn on FileVault to encrypt your disk, which protects your data if the Mac is lost or stolen.
What to Do With Your Old PC
Once you are sure everything has transferred, keep the PC for a couple of weeks as a safety net. When you are ready to sell, donate or recycle it, back up anything final, sign out of accounts, and use Windows’ reset option to remove your data. Singapore has e-waste collection points for responsible disposal of old electronics; check the National Environment Agency (NEA) website for current options.
Explore more: Transferring Your Data When Switching Phones