
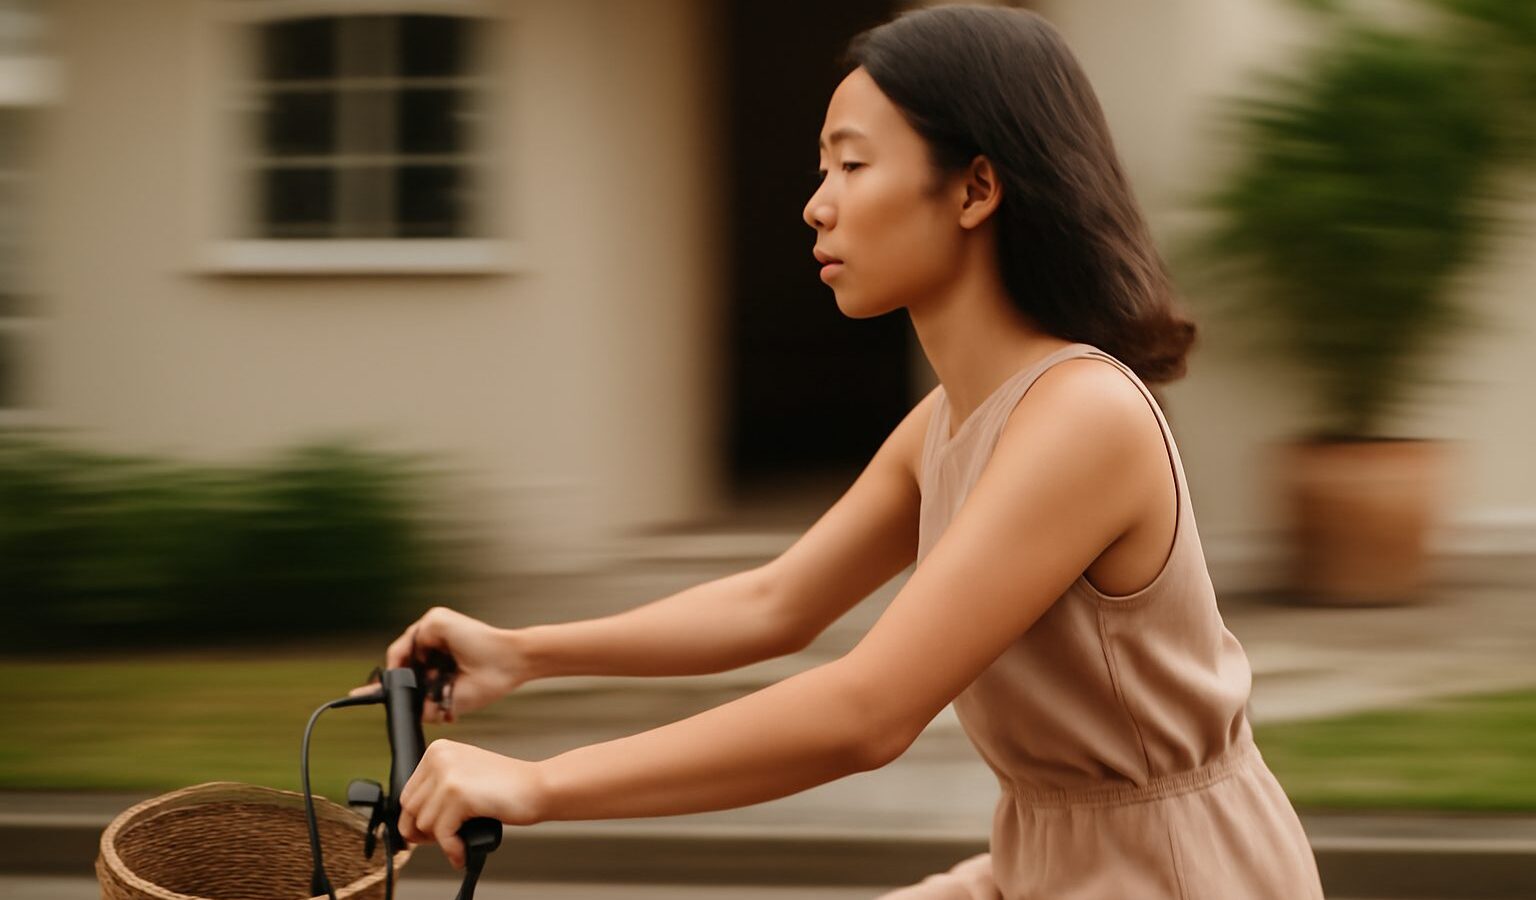
Panning photography is the technique of following a moving subject with your camera as you press the shutter, so the subject stays sharp while the background stretches into a smooth blur of motion. It is the reason a cyclist along East Coast Park can look pin-sharp against streaking greenery, or an MRT train reads clearly while the platform smears past. Panning photography turns speed into something you can see, and it gives ordinary moving subjects a real sense of energy. The good news is that it costs nothing to practise and works on phones as well as dedicated cameras.
This guide walks you through the idea, the settings and the practice, grounded in the places and light we shoot in around Singapore.
Why Panning Works
A photo freezes a slice of time. If you use a fast shutter speed, everything stops dead, including the sense of movement. Panning does the opposite by design. You choose a slowish shutter speed, then swing the camera to match your subject’s speed and direction. Because the camera and the subject move together, the subject lands sharp on the sensor while the stationary background, which the camera is sweeping across, blurs into horizontal streaks. Shutter speed is simply how long the sensor stays open; longer means more blur, shorter means less.
The magic is in the mismatch: your subject moves with the lens, the background does not. Get the swing smooth and the speed right, and you keep the subject crisp while everything behind it dissolves into motion.
Settings for Sharp Subjects and Streaky Backgrounds
The heart of panning is a deliberately slower shutter speed. Too fast and the background stays sharp, killing the effect. Too slow and even your tracked subject smears. The right value depends on how fast your subject travels.
| Subject and speed | Suggested shutter speed | Background blur | Notes |
|---|---|---|---|
| Walker or jogger | 1/30 to 1/60 second | Gentle streak | Easiest to start with, forgiving |
| Cyclist or slow bike | 1/25 to 1/50 second | Clear streak | Great at park connectors |
| Car or bus in traffic | 1/40 to 1/80 second | Strong streak | Watch for reflections and glare |
| Fast train or racing bike | 1/60 to 1/125 second | Bold streak | Faster subjects need less blur time |
Treat these as starting points and adjust from what you see on screen. On a dedicated camera, switch to Shutter Priority (marked S or Tv) so you set the shutter speed and the camera handles the rest. Keep ISO low, since ISO is the sensor’s sensitivity to light and a low value keeps images clean. On a phone, use a Pro or Manual mode if your camera app has one and set a slow shutter such as 1/30; if it does not, a dedicated panning or motion feature in some camera apps can approximate the look. If you tend to nail exposure only some of the time, our guide to exposure compensation helps you keep these mid-speed shots even.
The Panning Technique Step by Step
Smooth movement matters more than any single setting. Follow this sequence.
- Stand square to the path the subject will travel, feet planted, so your subject passes left to right or right to left in front of you.
- Pivot from your hips, not your arms. Twist your whole upper body as one unit for a steady arc.
- Pick up the subject early, while it is still approaching, and start tracking before you shoot.
- Match its speed with a smooth, continuous swing, keeping the subject in the same spot in your frame.
- Press the shutter gently while you are still moving, not at the end of the swing.
- Follow through after the click, like a golf swing, so the camera does not jerk to a stop mid-exposure.
- Use continuous autofocus to keep a moving subject sharp. On a camera this is AI Servo or AF-C; on a phone, tap and hold to lock tracking on the subject. Our piece on autofocus modes explains when to use each.
Expect to throw away most of your early frames. Panning is a numbers game at first, and even seasoned shooters keep only a handful from a burst.
Where to Practise in Singapore
You do not need a race track. Everyday movement is everywhere.
- Park connectors and East Coast Park are ideal, with a steady stream of cyclists and joggers moving predictably across your view.
- MRT platforms (where photography is permitted and you are not obstructing anyone) give you trains at a consistent speed, though mind the safety line and never lean over it.
- Roadsides along quieter stretches offer buses and cars, but stay well back on the pavement and keep your own safety first.
- Marina Bay and the city provide buses and the occasional cyclist against colourful backdrops that streak beautifully.
Always be aware of your surroundings, do not block pathways, and if you photograph identifiable people up close, be considerate and ask permission where appropriate.
Tropical Conditions to Plan Around
Singapore’s climate shapes when panning works best.
- Harsh midday sun floods the sensor, and a slow shutter in bright light can overexpose the frame. On a camera, keep ISO at its lowest and consider a neutral density filter, which is like sunglasses for the lens, so you can keep the shutter slow enough to blur. Shooting in shade or later in the day also helps.
- Short golden hour near the equator gives lovely warm streaks, but it fades fast, so arrive early.
- Humidity and fogging hit when you step from a cold mall or MRT into the heat. Let the lens acclimatise and wipe it with a microfibre cloth, or your background streak will look muddy.
- Sudden downpours in the monsoon mean keeping a cloth and dry bag ready. Wet pavements do, however, throw gorgeous reflected colour into your background blur once the rain eases.
Building the Skill
Give yourself one focused session. Pick a single spot, choose one shutter speed to begin, perhaps 1/40 second, and shoot the same type of subject twenty or thirty times, adjusting your swing each round. Review on the spot, note which frames are sharp, and only then change the shutter speed. Compare panning against simply freezing the action to feel the difference in mood; our guide on freezing fast motion covers that opposite approach. Over a few sessions your keeper rate climbs from almost nothing to something you can rely on.
Panning photography rewards patience and a smooth swing more than expensive gear. Set a slower shutter, track your subject as one steady motion, follow through, and let the background do the running. Once it clicks, you will have a technique that turns everyday movement around Singapore into images full of speed and life.
Explore more: how to freeze fast motion, understanding autofocus modes, and using exposure compensation.