

Your camera flashes “Card Error”, your laptop asks if you want to format the disk, or a folder of holiday photos suddenly shows as zero bytes. It is a sinking feeling, but in many cases the files are still physically on the card. Whether you can recover corrupted SD card data usually depends less on which software you use and more on what you do in the first ten minutes. This guide walks through the calm, careful order of steps that protects your best chance of getting everything back.
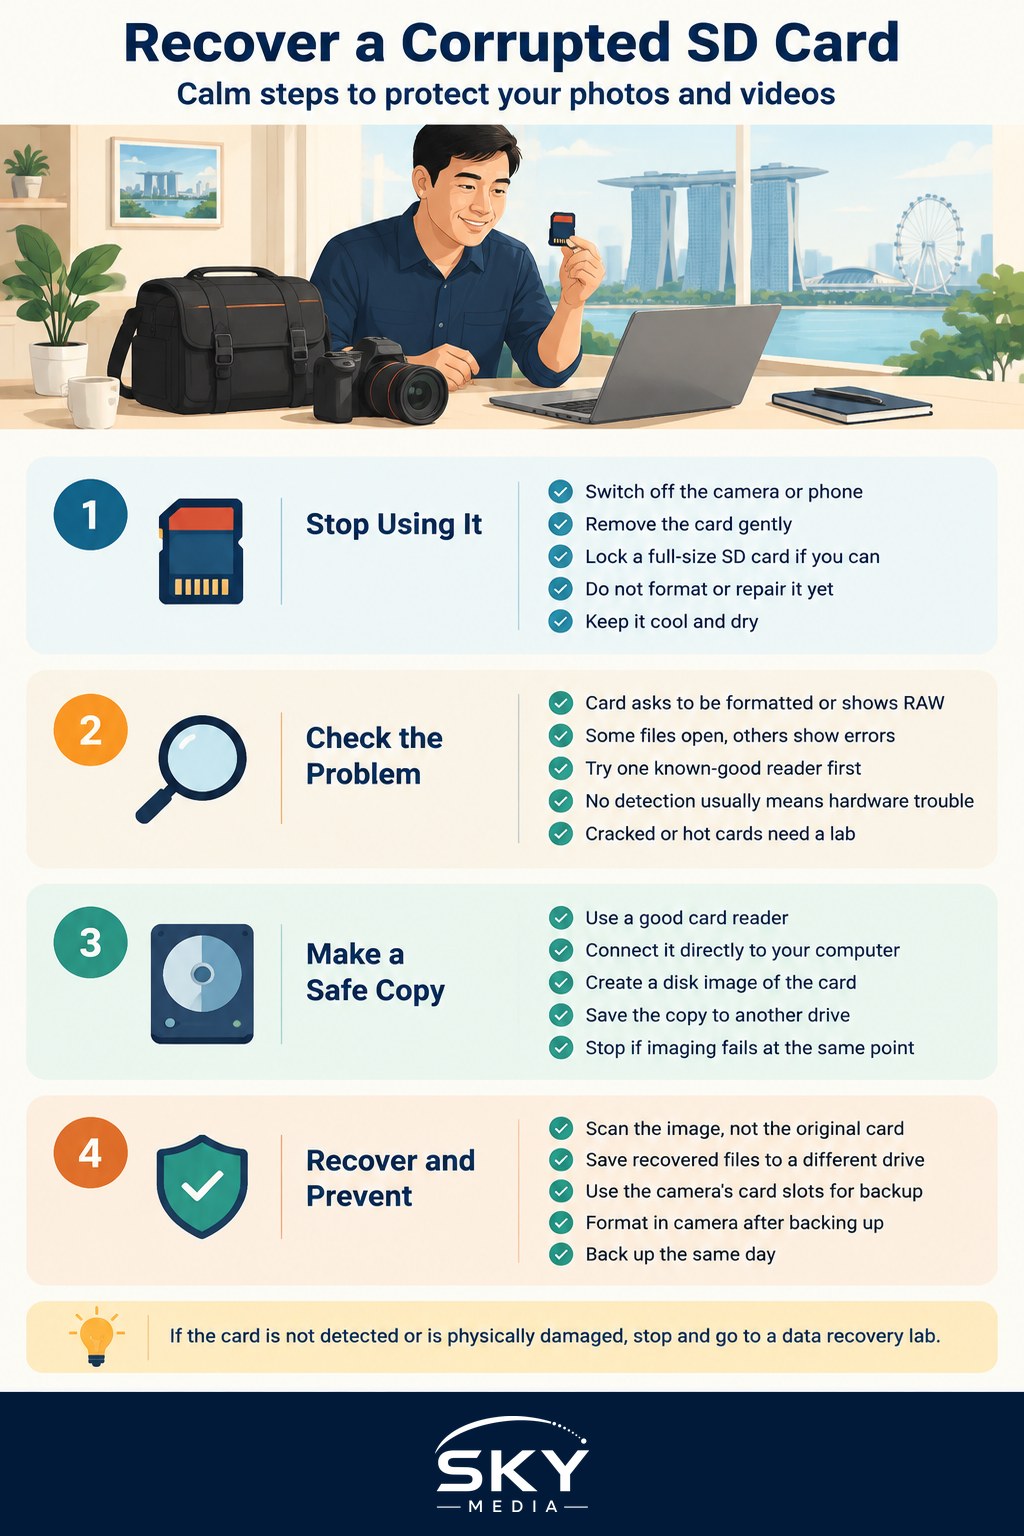
Stop Using the Card Right Now
The single most important rule is simple: stop writing anything to the card. When a card’s file system is damaged, your photos and videos often remain intact in the memory chips, but the “map” that tells the device where they live is broken. Every new photo, every in-camera repair attempt and every format can overwrite those hidden files permanently.
Do these things immediately:
- Switch off the camera or phone and remove the card gently. Do not keep pressing the shutter to “test” it.
- Flip the lock switch on a full-size SD card to the locked position. This tells most readers to treat the card as read-only.
- Do not click “Format” when your computer or camera offers to fix or format the card, even if the prompt looks helpful.
- Do not run disk repair tools such as a file system check on the card itself before you have a copy. They can “fix” the structure by discarding the very files you want.
- Label the card and keep it somewhere cool and dry. Singapore’s humidity is not kind to loose electronics in a bag.
If you shoot with two card slots, check whether your camera was set to record to both. Your backup card may already have everything, which turns an emergency into a non-event.
Work Out What Kind of Problem You Have
Not every unreadable card is broken in the same way. Knowing roughly which category you are in tells you whether DIY recovery is sensible or whether you should go straight to a professional.
| Symptom | Likely cause | Safe first move | DIY or professional |
|---|---|---|---|
| Card shows up but asks to be formatted, or shows as RAW | Damaged file system (logical corruption) | Make a full image copy, then scan the copy | DIY recovery software usually works |
| Some files open, others show grey thumbnails or errors | Partly written files, often from pulling the card mid-write | Copy everything readable first, then scan for the rest | DIY, with modest expectations for damaged files |
| Card is not detected in any reader or device | Controller failure, physical damage or a dead connection | Try one other known-good reader, then stop | Professional data recovery lab |
| Card is cracked, bent, water damaged or very hot | Physical damage | Do not power it again | Professional data recovery lab only |
The first two rows are logical problems and are the most common. The last two are hardware problems where repeated plugging in can make things worse.
Make a Copy Before You Try to Fix Anything
Professionals never work on the original card if they can avoid it, and neither should you. The idea is to create a complete, sector-by-sector image of the card, then run recovery tools on that image file. If something goes wrong, the original is untouched.
A practical approach:
- Use a good card reader. A cheap or worn reader can cause read errors on its own. If your laptop’s built-in slot fails, try a separate USB reader before concluding the card is dead.
- Connect it directly to your computer, not through a long chain of hubs.
- Create a disk image. Many recovery programs have a “create image” or “byte-to-byte backup” option. On macOS and Linux, more technical users use disk imaging tools from the command line. Save the image to your computer’s drive or an external drive with plenty of free space, never back onto the card.
- Check the image size roughly matches the card’s capacity. A much smaller file suggests the read stopped early.
If the imaging process keeps failing at the same point, stop. That pattern often points to failing memory, and a lab is the safer route.
Using Recovery Software on Your Copy
Once you have an image, you can scan it with photo recovery software. There are free and paid tools for Windows and macOS, and many offer a free scan that previews what can be recovered before you pay. Choose a reputable, well-reviewed tool and download it only from the developer’s official site, since “free recovery” downloads are a common way to spread malware.
What to expect from a scan:
- Quick scans read whatever is left of the file system and often restore original file names and folders.
- Deep or “signature” scans look for the patterns that mark the start of JPEG, RAW and video files. They find more, but file names are usually lost and you will get generic names.
- Camera RAW files are supported by many tools, but newer camera formats may need an up-to-date version. Check that your camera’s file type is listed.
- Video files are harder. Large clips are often split across the card, so they may recover only partly or play with glitches. Some tools specialise in repairing camera video.
Always save recovered files to a different drive. Open a sample of images at full size, not just thumbnails, to confirm they are intact. If you recently deleted files rather than suffered corruption, our guide on how to recover deleted files and photos covers that related scenario in more depth.
When to Hand It to a Data Recovery Lab
Go straight to a professional if the card is not detected anywhere, is physically damaged, or contains work you cannot afford to lose, such as a client wedding shoot. Specialist labs can sometimes read memory chips directly when the card’s controller has failed, which no software at home can do.
Before you choose a service:
- Ask whether evaluation is free and whether they charge if nothing is recovered. Pricing varies widely, so get a written quote.
- Ask how they handle privacy, especially if the card holds personal or client images.
- Check they work with your card type, since microSD cards in particular can need specialised handling.
- Do not attempt your own repairs first. Opening, heating or “fixing” a card can destroy data a lab could otherwise have saved.
Preventing the Next Corruption Scare
Most card corruption comes from habits rather than bad luck. A few routines go a long way:
- Format cards in the camera you will use them in, after you have copied and backed up the files, rather than deleting photos one by one.
- Wait for the write light to go off before switching off the camera or removing the card.
- Eject properly from your computer before pulling the card out.
- Replace cards that have shown errors before, and retire very old ones.
- Use more than one card on important trips instead of one huge card that holds everything.
- Back up the same day. Copy files to your computer and a second location such as cloud storage or an external drive.
If your images were recovered but some look too dark or too bright, editing can rescue more than you think. See how to recover highlights and shadows for practical techniques.
A Calm Checklist for the Moment It Happens
When a card fails, remember the order: stop using it, lock it, do not format it, make an image copy, scan the copy, and save recovered files elsewhere. If the card is not detected or is physically damaged, skip the software and speak to a lab. Taking ten slow minutes now is the difference between a frustrating afternoon and losing a trip’s worth of memories for good.
Further reading: How to Choose a Camera Memory Card Without the Confusion