
A silversmithing class in Singapore is one of the more hands-on ways to spend a weekend. Instead of threading beads or stamping letters onto a ready-made blank, you start with raw sterling silver sheet and wire, then cut, file, shape, solder and polish it into a ring, pendant or pair of earrings you built yourself. It is real metalwork, with a small flame, real tools and a little patience.
This guide explains what silversmithing actually involves, how it differs from the craft jewellery sessions you may have seen, what a beginner class usually covers, and how to choose a studio that suits your goals.
How Silversmithing Differs From Basic Jewellery Making
Many “make your own jewellery” sessions are assembly crafts. You pick charms, string beads or hammer letters onto a pre-cut disc. These are fun and quick, but you are mostly decorating parts someone else fabricated.
Silversmithing is fabrication. You create the piece from stock material, so the shape, size and finish all come from your own hands. That is why it takes longer, why the tools are more serious, and why the result feels more personal.
| Craft type | What you start with | Core skills | Typical result |
|---|---|---|---|
| Beading and charm jewellery | Ready-made beads, chains and findings | Stringing, crimping, simple wire loops | Bracelets and necklaces assembled from parts |
| Metal stamping | Pre-cut metal blanks | Hammering letter and pattern stamps | Personalised tags, discs and simple bangles |
| Silversmithing | Sterling silver sheet, wire and solder | Sawing, filing, annealing, soldering, forming, polishing | Rings, pendants and earrings fabricated from scratch |
| Lost-wax casting | Carved wax model | Wax carving, then casting (often done by the studio) | Sculptural rings and organic shapes |
If your goal is a quick gift with a name on it, stamping is a fine choice. If you want to understand how jewellery is actually made, and perhaps keep going as a hobby, silversmithing is the better path.
What You Will Learn in a Beginner Silversmithing Class
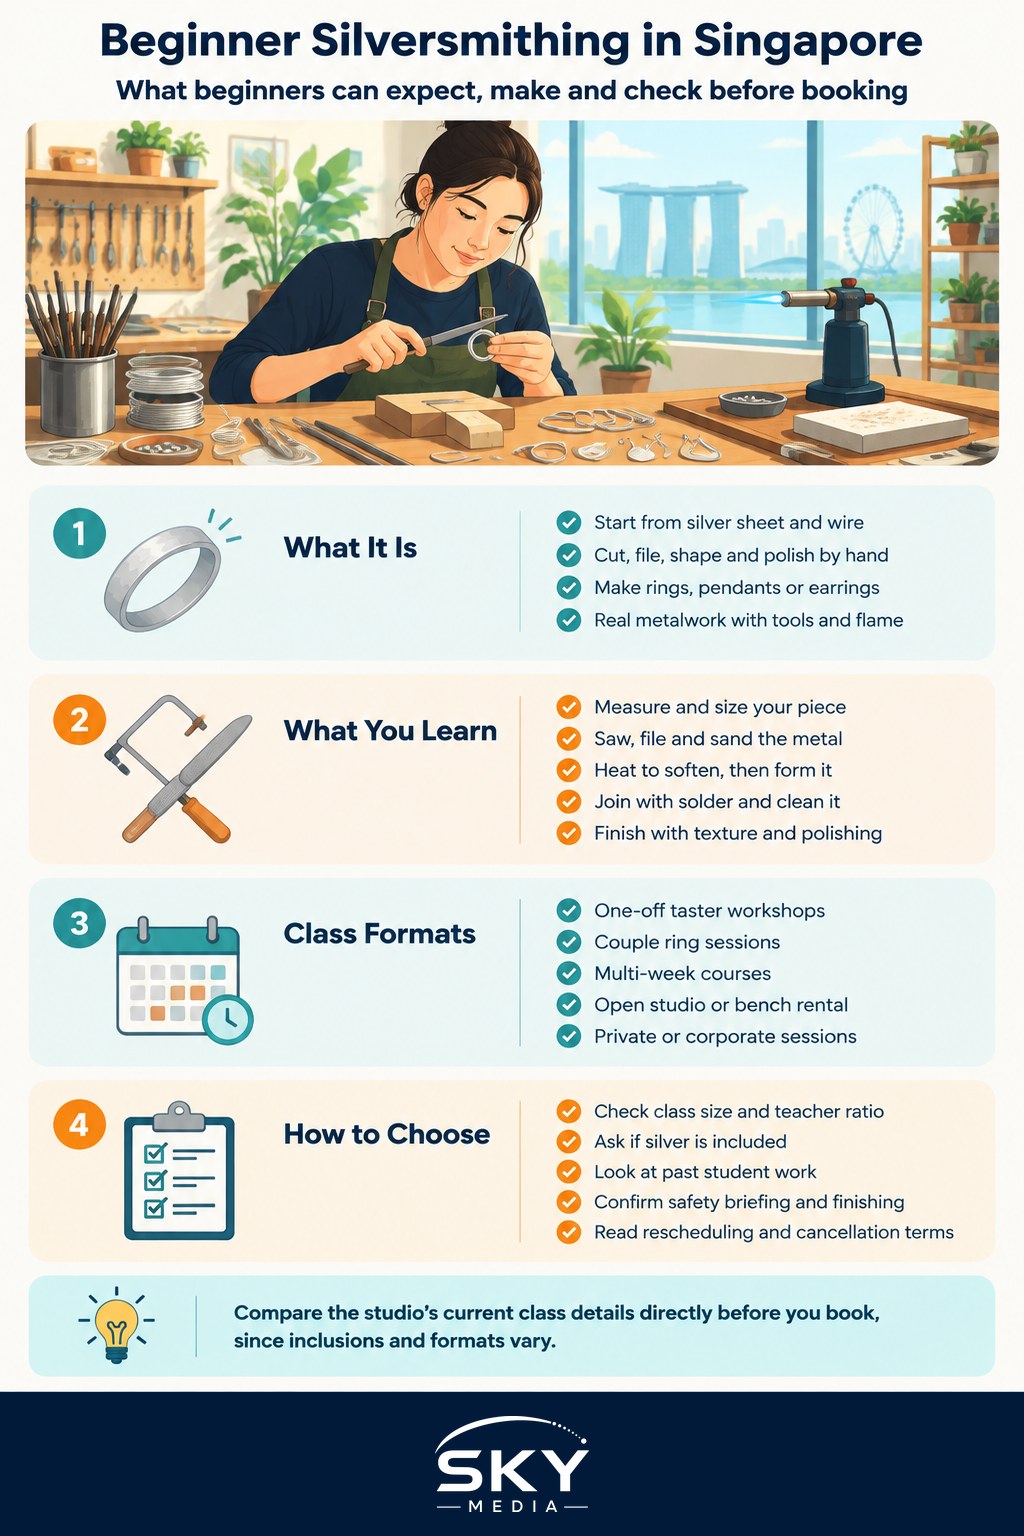
Most introductory classes are built around one project, usually a simple band ring or a pendant, because it teaches the full workflow in a manageable size. Along the way you will typically meet these techniques:
- Measuring and sizing. Using a ring sizer and working out how long your strip of silver needs to be for the finished size.
- Sawing. Cutting sheet with a jeweller’s saw, a fine blade held under tension in a frame. Expect a few broken blades; everyone breaks them at first.
- Filing and sanding. Cleaning up edges and making joints meet perfectly flush, which matters for a strong solder join.
- Annealing. Heating the metal with a torch to soften it so it can be bent and shaped without cracking.
- Soldering. Joining pieces using silver solder and a small torch flame. This is usually the moment beginners find most exciting, and the instructor will normally demonstrate and supervise closely.
- Pickling. Cleaning off oxidation and flux after heating, using a mild acid solution handled by the studio.
- Forming. Shaping a ring round on a steel mandrel with a rawhide or nylon mallet.
- Texturing and finishing. Adding hammered textures, then sanding and polishing to a matte, brushed or mirror finish.
Some classes also introduce stone setting, usually a simple bezel setting, but that is more often a second-level or follow-on session. A good instructor will tell you honestly what is achievable in the time available.
Class Formats You Will Find
Silversmithing in Singapore is offered by independent jewellery studios, craft collectives and some community and lifelong-learning programmes. Formats tend to fall into a few broad types:
- One-off taster workshops. A single session focused on one project, such as a band ring or stacking rings. Good for couples, friends and gift-making.
- Couple ring sessions. Each person makes a ring for the other. Popular for anniversaries and proposals, and usually a little longer.
- Multi-week courses. A series of lessons that builds skills step by step, often ending with a more complex piece involving stone setting or multiple soldered parts.
- Open studio or bench rental. For people who have already learned the basics and want access to tools and supervision to work on their own designs.
- Private or corporate sessions. Arranged for small groups or team events.
Prices, durations and what is included vary widely between studios and change over time, so compare the current details directly with each studio rather than relying on old listings.
How to Choose the Right Studio
Because silversmithing involves heat, sharp tools and chemicals, the quality of instruction matters more than in most craft classes. Before booking, check:
- Class size and teacher ratio. Smaller groups mean more help at the soldering stage, which is where beginners most need it.
- Is the silver included? Ask whether material cost is part of the fee and how much silver you get. Some studios charge extra for thicker or wider designs.
- What exactly you will make. Look at photos of past student work for that specific class, not just the instructor’s own pieces.
- Safety briefing. A responsible studio will brief you on torch use, ventilation, eye protection and how pickle and chemicals are handled.
- Finishing time. Some studios let you take your piece home on the day; others finish polishing or plating afterwards. Ask so there are no surprises.
- Hallmarking and metal quality. If it matters to you, ask what grade of silver is used. Sterling silver is the usual standard for this kind of work.
- Rescheduling and cancellation terms. Read these before paying, especially for couple sessions booked around a date.
If you enjoy learning by making, you may also like our guides to woodworking classes and sewing and dressmaking classes, which share the same “build it from raw material” spirit.
What to Wear and Bring
Most studios supply tools, materials and aprons. You will be more comfortable if you:
- Wear closed-toe shoes and clothes you do not mind getting a little dusty.
- Tie back long hair and avoid loose sleeves or dangling accessories near the torch.
- Keep nails short if you can; filing and sanding are easier.
- Bring reading glasses if you use them, as much of the work is fine detail.
- Bring a few design ideas or reference photos, but be ready to simplify for a first project.
Hands can get grubby from polishing compounds, so allow a little time to wash up before your next plans.
Taking Silversmithing Further as a Hobby
After one or two classes, many people want to keep going. Silversmithing can be practised at home on a small scale, but a torch, pickle and polishing equipment need proper ventilation, safe storage and care, which can be tricky in a typical HDB flat or condo. If you live in a residential unit, check your building rules and think carefully about fire safety before setting up any open-flame equipment. For many hobbyists, renting bench time at a studio is the safer and more practical option.
Good next steps include:
- Taking a stone setting class to learn bezel and prong settings.
- Trying lost-wax carving for more sculptural shapes.
- Learning to make your own chain links or clasps.
- Sketching designs in a notebook and building a small portfolio of finished pieces.
Silversmithing rewards patience. Your first ring may not be perfectly round, and the solder seam may show, but it will be entirely yours.
Explore more: Woodworking Classes · Sewing and Dressmaking Classes
Frequently Asked Questions
Is silversmithing hard for a complete beginner? It is more demanding than bead jewellery, but beginner classes are designed around one simple project, usually a band ring or pendant. Expect some broken saw blades and an imperfect first piece. Close supervision at the soldering stage makes it manageable.
Is working with a torch in a silversmithing class safe? Studios manage the risk with a safety briefing, supervision and eye protection, and the instructor usually demonstrates soldering first. Tie back long hair and avoid loose sleeves. If you have concerns, ask the studio how they handle the torch and ventilation before booking.
Can I make a ring that fits exactly? Yes, sizing is part of the lesson. You measure with a ring sizer and work out the length of silver needed, then shape it on a mandrel. Fit can still need small adjustments, so ask whether the studio offers resizing after the class.
Is silversmithing a good activity for a date or couple? Yes, many studios run couple sessions where each person makes a ring for the other. These tend to run a little longer than a single-person workshop. Check rescheduling terms before paying, especially if it is booked around an anniversary.
Can I practise silversmithing at home in an HDB flat? It is not easy. Torches, pickle and polishing equipment need proper ventilation, safe storage and fire safety, which is hard in a flat or condo. Check your building rules first; renting bench time at a studio is usually the safer choice.
Further reading: Wheel Throwing Classes in Singapore for Beginners